

Have you ever wondered what it takes to translate an idea into a fully rendered image in just seconds? This is precisely what the GPT image 2 model can do, and with Dreamina's advanced image generation tool, it gets even better!
Designing social media graphics, concept art, marketing visuals, and much more - this tool enables you to go from imagination to final result without having any particular experience with design.
The true trick lies not only in creating images but also in directing the AI on exactly what you want to achieve through the process.
Here are a few tips to take full advantage of this and create truly imaginative visuals.
The reasons why text-to-image feels like using superpowers
Text-to-image tools are completely revolutionizing the design process. Rather than beginning with a blank canvas, you begin with your imagination, and AI works its magic on it.
The key to success is in simplicity:
- Describe, don't draw
- Refine, don't redo
- Iterate quickly without any technical restrictions
It expands the creative possibilities for everyone from beginners to experts. Branding, visuals, stories - anything you desire begins with one thing - your prompt.
The key to great visuals with AI
First of all, we should clarify that the outcome of your work depends on the initial data. Many people often askhow to use GPT image 2 for rendering stunning masterpieces. Well, it's quite simple.
Here, the ability to generate images using GPT image 2 is very helpful. In this case, one cannot write a prompt about the concept - it will not be enough.
A well-structured prompt should contain:
- Subject (who or what to depict?)
- Style (realistic, cinematic, minimalist, artistic)
- Light (soft light, neon, daylight, studio)
- Composition (zoomed, wide-angle, angle of view)
- Mood (dramatic, serene, futuristic)
Instead of writing such a phrase as "a girl in a park."
One may write "cinematic portrait of a young woman who stands in the light of the sun in a park at golden hour, with soft light, shallow depth of field, warm color tones, photo in DSLR style".
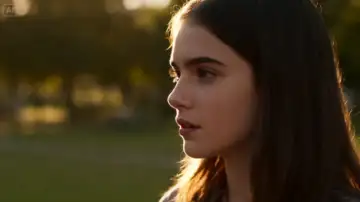
As you see, one phrase shows the concept and the other depicts the actual vision.
3 creative ways to use this tool
Now we should shift from theory to practice and discuss how you may apply this knowledge in real tasks.
1. Concept visualizations in projects
You have some ideas for campaigns, brands, or even movies. What should you do?
You can visualize any concepts by generating:
- Posters for events
- Brand identity moodboards
- Previews for stories
It enables you to try out your hypotheses without having to spend any time or resources on creating the content.
2. Unique social media visuals
The era of scrolling is upon us-your imagery must capture the finger.
AI-created images allow you to play around with:
- Vibrant color schemes
- Unusual compositions
- Stylistic visual themes
Rather than sticking to conventional templates, you can generate unique visuals that match your messaging.
3. Customized creative experiments
Sometimes, you simply have to let your creative juices flow.
You might:
- Translate your fantasy into surreal art
- Create characters or worlds
- Develop visual elements that do not exist in the physical realm
The best thing about it is that you can achieve all of the above by utilizing a free GPT image 2 pipeline in Dreamina.
Lighting up, prompts, creating imagery with GPT image 2 in Dreamina
Step 1: Access the Dreamina "AI Image" feature
Firstly, open Dreamina and navigate to the "AI Image" feature located on the homepage. Afterward, click on "Upload", then upload an image to serve as your input data. Then, write a clear and comprehensive prompt to help generate the image.
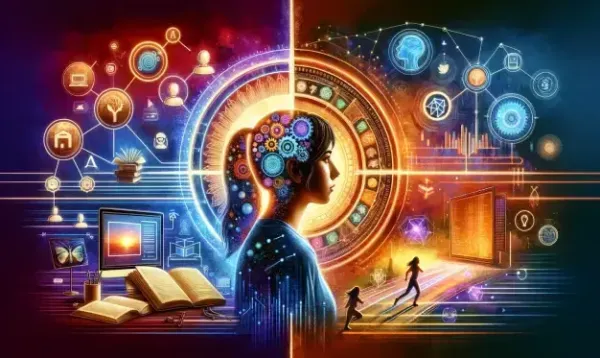
Prompt example: Design an imaginative and creative young designer seated at a contemporary desk, observing text becoming digital art on a bright computer screen, with futuristic user interface elements swirling around, illuminated by gentle neon lighting, a minimalist workspace setting, realistic imagery, cinematic composition, and detailed renderings.
Step 2: Creating the AI image
Secondly, select the AI model, GPT Image 2, then select the correct size of the image. This would help the AI understand more easily what you expect of the output, particularly in terms of consistency. Press the Dreamina's icon to create the AI image.
Step 3: Downloading the realistic image
You will get four options of images generated by the system; select your favorite then make any necessary edits such as inpaint, remove and so forth. Lastly, click the "Download" icon in the top right-hand side of the interface.
Creating visuals out of conceptual ideas
Once you've got your picture, the work isn't over yet. Improvement is the difference between an OK result and a stunning one.
Here's how you can make yourself better:
- Make minor changes rather than creating anew
- Apply inpainting to correct certain parts
- Try out new prompts for different outcomes
By repeating this process, you'll be able to gradually approach your desired output without beginning from scratch each time.
Why this workflow differs from conventional design
Conventional design programs need:
- Skill and know-how
- Dedication and effort
- Personalized execution
The AI-driven workflow is precisely the opposite.
Now, you:
- Think about your concept rather than software
- Invest time in improvement instead of creation
- Create several variations simultaneously
It makes the process more convenient for everyone while preserving the opportunity for creativity for skilled professionals.
Blunders that will wreck your outcome (and how to prevent them)
Despite its straightforward nature, this process still leaves room for mistakes that might affect your final product.
Steer clear of these common pitfalls:
- Formulating extremely brief prompts
- Neglecting the lighting and composition aspects
- Believing you'll achieve perfection in your first attempt
Remember to communicate with the machine effectively instead.
Creativity combined with control
The best part about this method is the synergy between automation and control. You are not only pressing a button but controlling the result.
It allows you to do such things as:
- Consistency within visuals
- Building up your unique style
- Creating whole creative projects
What makes this even better is that Dreamina lets you integrate editing tools into your workflow, so you do not have to switch platforms.
Closing thoughts: let Dreamina help you visualize ideas quickly
Nowadays, creating visuals does not require years of practice, but clarity of thought. With the GPT image 2 extension, it takes you less than a minute to generate any number of images from simple prompts.
The true magic behind Dreamina's GPT image 2 is in its accessibility and flexibility!